The Bean Machine
The Bean Machine is an experimental project in visual programming and composition in Java. It's at a very early stage, but still fun to play with. You can build up a composition by creating various types of nodes and joining up their inputs and outputs. It's designed to be completely extensible and it's easy to create new types of nodes. There's no need to be limited to visual compositions either, it's easy to create nodes which manipulate text, play sounds or read input devices.
Warning: When I say that this is at an early stage, that's exactly what I mean. Saving and loading, undo, cut and paste don't work, exceptions appear all over the place, some things only work on particular platforms and so on. It's very much a spare-time project and the design needs to be finalized before it's ready for prime time. The Bean Machine will be available for download very soon.
A Simple Example
The best way to explain how it works is with a simple example. We're going to create an animated rotating cube with a movie playing on its faces. We'll do it in easy steps so you get the idea of how everything works.
Step 1: Displaying a Cube
To display a cube, we're going to need two nodes: a 3D primitive node and a Display node. Drag a 3D Display node from the library at the left into the drawing area. Next, drag a 3D Primitive node in and plae it to the left. Now drag from the output of the Primitive node to the input of the Display node. This creates a link connecting the two together. Your graph should look like this:
The Simple Cube Graph
When you create the link, a window should appear displaying a white sphere. Now select the Primitive node by clicking on it. When you do this, a set of property controls will appear at the right of the main window. The first of these is labelled Shape. Change this from Sphere to Cube, and you should now have a white cube. You can click and drag in the viewer window to see the cube from different angles or zoom in and out.
Step 2: Texturing the Cube
Now we're going to display a movie on the cube. Drag in a 2D graphics/QTMovie node and connect its output to the texture input of the Primitive node. You should now see the first frame of our test movie on each face of the cube. To play the movie, press the Play button at the bottom of the window. The movie will play once and then stop (although the cube animation is still playing - movies don't loop by default).
Step 3: Rotating the Cube
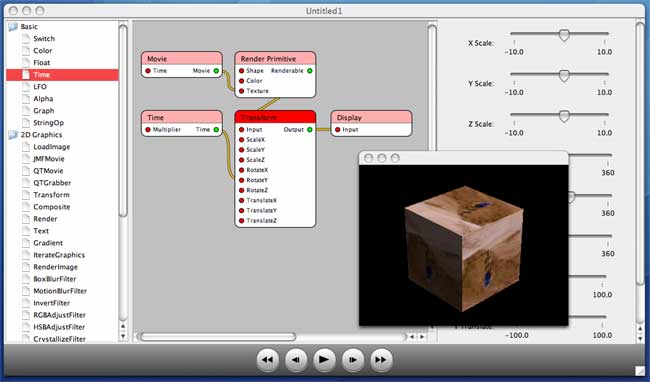
Finally, we're going to make the cube rotate. To do this, we'll need to modify our graph a little. Drag in a 3D Transform node and a Time node. Connect the time output to the RotateY input of the Transform node. Finally, change the output conneciton of the Primitive node to go to the input of the Transform node and connect the Transform output to the Display input. Your graph should now look like this:
The Rotating Cube Graph
Press the "Play" button and the cube should start to rotate while displaying the movie:
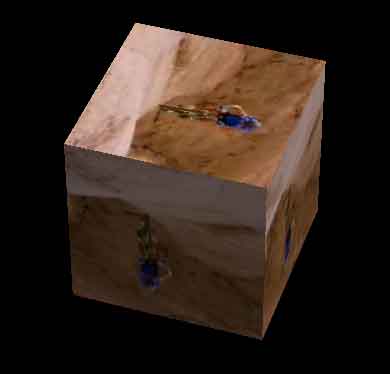
The Rotating Cube
More About Nodes
As you've seen, nodes have inputs, outputs and properties. Some nodes expose properties as inputs, so it's possible to either feed the input from the output of another node or set it to a constant value in the property sheet. In Java terms, nodes are Java Beans, and typically (though not necessarily), inputs and outputs are bean properties. Usually, outputs are read-only properties, whereas inputs may be read/write or write-only depending on their usage. Inputs and outputs are typed using the Java type system, so you can only connect ports which have the correct types. Because nodes are beans, graphs can be saved to disk using XML serialization.
There are many different types of node. Things are at a very early stage at the moment and there will be a lot more coming soon.